There are plenty of PCT gear reviews out there on the internets and I wasn't originally going to do one myself. However, one more gear wrap up certainly isn't going to blow up the web or collapse global servers and maybe some of you will find this helpful. I have a feeling that the PCT is going to see an increase in traffic in the coming years, partly from the "Wild" effect and partly because it seems inevitable. I must admit to having mixed feelings about this, hiking the PCT has been one of the most incredible experiences of my life and I would love to see many others have a similar experience. On the other hand, more people on the trail leads to more trash, more problems and a change in trail culture. Hopefully, those who do attempt the PCT in the future plan ahead, hike responsibly, show respect and avoid giving thru-hikers a bad reputation.
With that out of the way and in the hopes of helping future thru hikers prepare for an intense, amazing and challenging journey, here is a summary of my PCT gear.
To see my pre-hike gear post go here: PCT Gear List
The Big Three:
1. Shelter
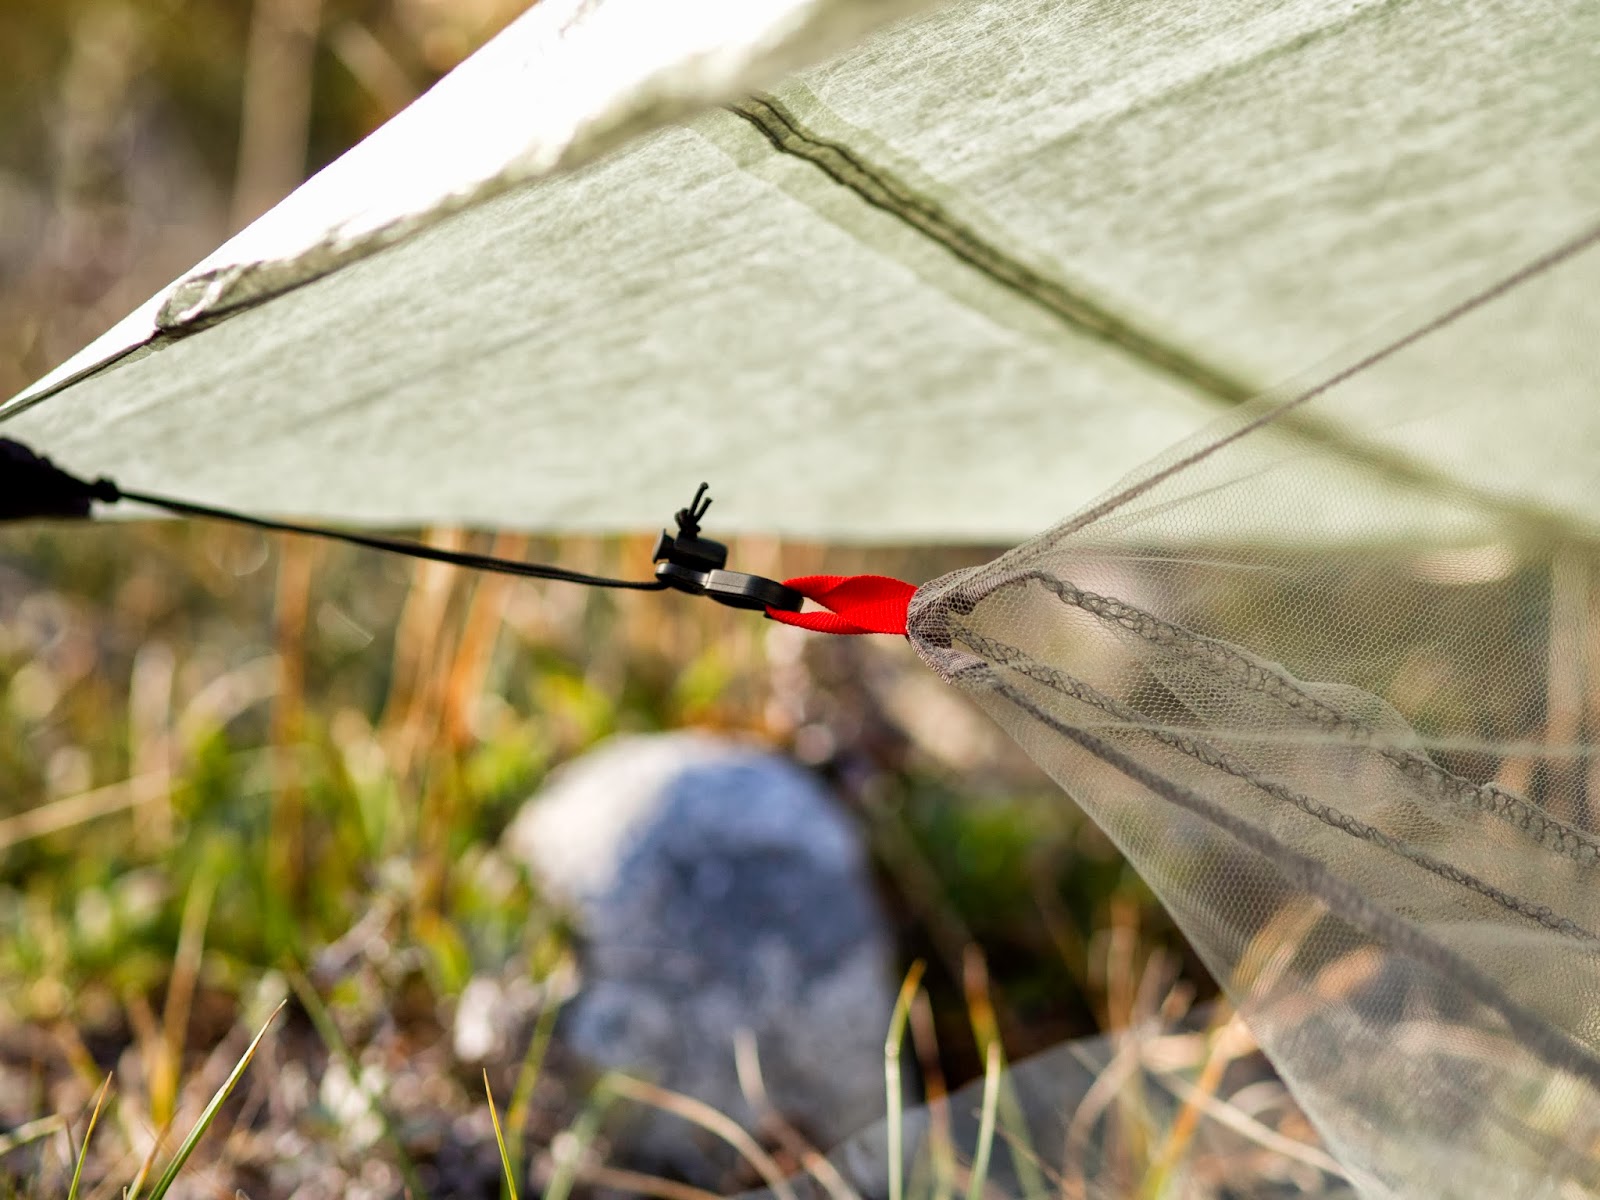
Zpacks Hexamid Solo Tarp (full review): Just about perfect for the PCT! I only set mine up about a dozen times, so for a shelter option that you will basically keep in the bottom of your pack, the weight is hard to beat. In extended rain, it is difficult to stay dry, even when used with a bivy. In my opinion it is mainly for emergency use only. If I was expecting extended rain or much snow I would look into a different shelter. But for the majority of the thru-hiking season (May to September) it is perfect because you don't need a shelter for 90% of the time.
MLD Superlight Bivy (full review): I used this every single night unless I was sleeping indoors and loved it. While not strictly necessary I found this bivy to provide wind protection, kept my quilt snug around me and kept out the bugs and mice. It can be claustrophobic for some, by suspending the mesh hood up off my face, I slept very comfortably. Problems that I had were that the DWR wore out (so it would wet out very easily), the zipper started failing and I got a hole in the mesh. But I have slept a solid 250 nights in this thing over the years and I am surprised it has lasted as long as it has.
2. Sleeping
Enlightened Equipment Revelation X (20 degree): Great quilt, kept me warm every night and was overkill for 75% of the trail. I liked the quilt a lot and my only complaint was that I really didn't need that much warmth. It weighs 26 oz and took up a fair bit of room in my pack. If I were to do the PCT again I would get a lighter quilt and supplement it with a warmer hooded jacket. This way I could mail the jacket ahead to Cascade Locks from Echo Lake and not have to carry the extra weight!
Thermarest Neoair (full length): Absolutely loved it! I was so happy to snuggle into my cocoon every night and this is about as comfortable as my bed at home. Having said that, in the future I might just go for a foam pad. Sure its not as comfortable but I was so tired every night that I would have slept anyways. Blowing it up and deflating it every morning was tiresome and I was always paranoid about putting a hole in it. A closed cell foam pad is much simpler and bomb proof.
Gossamer Gear 1/8" thinlite pad: Basically protection for my neoair and I used it to nap on. Some hikers use this as their only pad, they are god-like and magical, I cannot imagine being comfortable with just this. But for what I used it for, perfect.
3. Backpack
Zpacks Arc Blast 60L (full review): I really wanted to like this pack but I switched it out in Lone pine (~ 750 miles into the trip). For the weight and bulk I was carrying this pack was not sufficient and I had very painful shoulders and hips. If I were to use this, I would absolutely have to have a base weight under 10 lbs. Also, you will be lucky to get more than one thru hike out of this pack.
HMG Windrider 4400 (full review): I really liked this pack, almost perfect for a thru hiker. I carried it for the remaining 1900 miles and will continue to use it in the future. The 4400 size is overkill for most, but I managed to fill it up a few times. I still can't believe I could fill it up... Carried incredibly well, water resistant, durable and you can impress your friends with the cuben fiber. However, they are not cheap and if I didn't get a hefty discount I would never have bought one. But read my full review for the full story.
Clothing Worn:
Columbia Tamiami long sleeve shirt: Awesome hiking shirt! I use this for work when I am in the field in temperatures up to 120 and it breathes really well. This has been my go-to hiking shirt for the past 5 years and will continue to be. Size runs large so buy one size smaller.
Nylon Shorts: I got mine at the thrift store for four dollars and they lasted 5 years and 4500 miles. Try to avoid expensive shorts, they are not worth it. I like having big pockets to put snacks and my phone in, you may be different.
Synthetic boxers: I used REI brand, they worked. Some people prefer commando, I don't.
Darn Tough socks (no show ultralight versions): Great Socks, get them on sale and have them for life. Mine lasted about 300-400 miles each then I would turn them in at an outfitter on the trail and get new ones for free. Lifetime warranty FTW!
Brooks Cascadia 9 shoes: Completely subjective choice, footwear is probably one of the most difficult gear decisions. These worked for me, I could get 900 miles on a pair (not really recommended) and I never got a single blister (may not be the shoe I almost never get blisters). I did have daily foot pain that never went away, this seems to be my curse as I always get foot pain in any shoe I have ever used, usually after 10-12 miles.
Outdoor Research Sunrunner hat: Great sun hat, I wore it every day. It started to fall apart by the end of the trail.
Simblissity Levigaiters: I love light gaiters and have used these for years but now I hate them. They did not stay secured very well for me and I found myself admiring all the dirty girl gaiters everyone else had. The dirty girls need the Velcro tab, but really a little super glue and you are golden. Do yourself a favor and get the most crazy and loud dirty girl gaiters you can.
Other Clothing:
Just a preface, this is where I would make the most gear changes if I were to do the PCT again.
Patagonia Houdini Windshirt: Pretty awesome piece of clothing and I wore it quite a bit but I would not take it again. I would just use my rain jacket instead.
Montbell Stretch Windpants: I love these and I will cry when they wear out. I wore shorts most of the time but when I didn't I wore these.
Patagonia Capilene 1 tops and bottoms: I used these mainly to keep my sleeping quilt clean. I only needed them for warmth maybe 4 days on the whole trail. I would not take these again, I would take a set of Terramar silk tops and bottoms at half the weight and price and 1/4 the durability (be careful!). Or just be a dirtbag and wear your hiking clothes to bed.
Montbell Ultralight Down Jacket: Great jacket, I love the fit of Montbell but this one is not very warm. I would switch out for a warmer hooded jacket that is 12 oz or less and be happy. My ultimate thru hike jacket is the Nunatuk Skaha Plus, but unless you use dollar bills to wipe your ass, you probably can't afford it. The Montbell Mirage Parka looks pretty decent (also not cheap but at least not insane).
Outdoor Research Helium II rain jacket: I liked it, I would take it again. Never really got to test out how waterproof it was because I was using an umbrella but it worked well to shed wind and keep me warm when I needed it.
Zpack cuben rain wrap: I don't know what to say about this. It is a great idea and works well except that the zipper broke the 3rd time I used it. I continued to use it after that, I just couldn't unzip it, fortunately it broke near the top so I could still walk normally while wearing it. I brought a pair of rain pants starting in Washington that I never used, the rain wrap thing is really functional, just watch the zipper.
Mountain Hardwear liner gloves: They weigh about 1oz and I used them from the border up to Yosemite and then from Snolqualmie pass to the Canadian border. Not super warm but if you are in the normal thru hiking season you don't need a super warm glove.
Mountain Laurel Design rain mitts: I only used these a couple of times, they are not waterproof, kind of disappointing. Not really necessary until Washington and I would try the Zpacks cuben fiber ones.
Zpacks fleece hat: It fit pretty well and kept my shaved head warm.
Cheap Flip Flops: Spend a little more and get the 10$ flip flops, they will last the entire thru hike and your feet will love you. I went through 4 pairs of cheap ones and finally wised up. I used flip flops every single day, great for letting your feet air out and breathe.
Cooking and Hydration:
Snowpeak Litemax Canister stove: It worked really well, and I ended up using it for the entire hike and sending my alcohol stove home. They are safer than alcohol, they heat up water much faster and you can simmer. What's not to like? Well, from Oregon north, finding fuel is sometimes a pain.
Evernew titanium pot 1100 mL: Worked well but bigger than I needed, a 900 mL would have been fine and lighter. Check out Toaks, they have super light titanium cookwear for cheap!
Titanium spoon: go for the long handle and keep your hands cleaner.
Snowpeak titanium mug 600 mL: really not necessary, I am not sure if I would take a cup on a future thru hike, but a nice luxury. Again, check out Toaks for good options.
Insulating Pot Cozy: I liked having it, you could use your jacket or sleeping bag but what if it spills?
Sawyer mini water filter: I loved this at first and then hated it by the end. No matter how many times I backflushed it would clog up very quickly and filter very slow. Do yourself a favor and get the normal sized one, and definitely bring the plunger thingy to backflush. If I didn't hate the taste of Aqua Mira, I would probably use that instead. Also, I used my filter in a gravity set up, I still like this method as the squeezing gets old pretty fast. If you do this with the normal sized sawyer you will need an adapter to fit it into a tube.
Platypus bladders: I got 2 leaks and had to replace them, but overall very happy. Really lightweight and collapsible option. Smartwater bottles work well too and are cheaper but not collapsible.
Camera and Electronics:
Camera Gear:
This could be the subject of an entire blog post, so I am not going to go into it here. Plus, I still don't know how I feel about what I did. I questioned my sanity every day but as a photographer I could not do without. I will say that if you never plan on printing your photos and they are for the web only, then a small camera or even a smartphone with a good camera will be fine. If you are picky and critical like I am, then just grin and bear it.
Electronics:
Homemade solar panel: My dad made it for me (thanks Dad!) and it worked great, was free and fairly light. If I was to do it again, I would just bring an external battery that can charge my phone a couple times per charge and be happy. As a side note I originally planned to use the solar charger to charge my camera batteries as well, I ended up not needing to do that, three camera batteries was more than enough.
Eton Boostblock 6600 mAh: I bought this from Amazon while on the trail and had it delivered to Callahans near Ashland (I am still amazed by this whole internet thing). It weighs 6 oz and took a while to charge but would keep me powered for at least 10 days. Unless you are a power user, this is pretty much all you need.
Motorola Moto G: It cost $200 was unlocked and did everything I needed. The camera on it sucks, just so you know. I never had a smartphone until I started this hike, I found it to be extremely useful. Not only are there some great apps for the trail but you can check weather, order gear (and pizza!), take notes, blog from the trail. It really was a great device. If you can afford it, Verizon had the best coverage by far. I had AT&T and was disappointed often.
Everything Else:
First Aid Kit: bring it and know how to use what you bring, hopefully you wont have to. I never did.
Gear Repair Kit: again, useful if you need it, useless if you don't but I would bring it again. I used cuben fiber repair tape once on my pack and that was it. I watched Slow Bro repair his hipbelt with a needle and thread, he was really glad he brought a kit.
Toiletries: Brush your teeth! A side note about toilet paper - if you use it, Pack it Out! Please! I am not anti TP, I use it and love it but I carry it out in a little plastic bag. Its not a big deal and then you are not contributing to trashing the PCT. Thank you.
Zpacks cuben fiber stuff sacks: All of my cuben fiber stuff sacks wore out quickly and were never waterproof, I switched to Outdoor Research silnylon dry bags and was happy for the change. More durable and actually water proof.
Aloksak (large size): I used this more for peace of mind, they would last about 400 miles. At first I could fit 4-5 days of food in one, when hiker hunger came on I could not fit more that 2.5 days of food in them. I slept with my food every night, never had a problem with bears or mice. Was it because of these? I don't know but I will keep using them.
Brunton ADC Pro: It can do pretty much everything except cook me dinner. Was kind of cool checking wind speeds in the desert and water speed when crossing creeks. Of course it does temperature, barometric pressure, altitude and a bunch of other stuff. What I mainly used it for was as my morning alarm and I would bring it again.
Petzle Tikka headlamp: I have mixed feeling about this. It worked but I think I really could have got away with a much smaller headlamp. I didn't night hike very often and ended up using this just around camp at night. I would look for a lighter option for a thru hike.
Black diamond Trail trekking pole: I only use one pole for some reason but I really like having it. I ended up breaking the tips off 2 poles but it could be the way I jab at things as I walk. Most people used trekking poles but it is a personal choice.
Halfmile maps: Use them and love them! Don't be like that stoned guy I met walking the wrong way down the trail because he was hiking without maps. And don't think it was because he was high, there were plenty of high people walking the right direction.
Swing Lightflex umbrella: same thing as the Golite Chrome Dome and now the only thing since Golite is bankrupt. I am still not sure how I feel about the umbrella. It was great in the desert, when it wasn't windy, which is about 10% of the time. It was great in the rain, when it wasn't windy, which was more like 75% of the time. I carried mine for the entire trail but used it rarely. I guess I really like the idea of the umbrella but maybe the reality of it is not so great. I would probably not bring it one for the desert again, cool to have but kind of a pain in the ass too. If I was expecting extended rain without much wind then it would be great, but otherwise I think it stays at home.
Gossamer Gear Polycro groundsheet: Super light and works great! I replace mine halfway through and was happy. It doesn't provide much protection from pokey things but for keeping your stuff off the ground its great.
Titanium stakes: they worked well, I bent one but otherwise no issues.
Brunton Compass: never used it, sent it home and never thought about it again.
Sierra Specific Gear:
BV500 bear canister: I used it because a canister is required, you should too but there is no way I could fit more than 5 days of food in one.
Sea to Summit headnet: kept me sane, highly recommended. I didn't actually need one until almost Oregon but I carried it from Lone Pine just in case.
Sea to Summit Nano pyramid net (full review): cool idea, I did use it a few times but the bugs were just not that bad this year and I sent it back from Ashland.
That pretty much sums it up. Go as light as you possibly can without jeopardizing your safety, every ounce really does count and your feet, legs and knees will thank you. If I were to do this hike again, I would aim to get my base weight down to 8 lbs (without camera gear dammit!). I hope this was post was helpful. If you are planning a thru hike, have fun you will absolutely not regret it. If you are not planning one, well maybe its time to think about it?
With that out of the way and in the hopes of helping future thru hikers prepare for an intense, amazing and challenging journey, here is a summary of my PCT gear.
To see my pre-hike gear post go here: PCT Gear List
The Big Three:
1. Shelter
Zpacks Hexamid Solo Tarp (full review): Just about perfect for the PCT! I only set mine up about a dozen times, so for a shelter option that you will basically keep in the bottom of your pack, the weight is hard to beat. In extended rain, it is difficult to stay dry, even when used with a bivy. In my opinion it is mainly for emergency use only. If I was expecting extended rain or much snow I would look into a different shelter. But for the majority of the thru-hiking season (May to September) it is perfect because you don't need a shelter for 90% of the time.
MLD Superlight Bivy (full review): I used this every single night unless I was sleeping indoors and loved it. While not strictly necessary I found this bivy to provide wind protection, kept my quilt snug around me and kept out the bugs and mice. It can be claustrophobic for some, by suspending the mesh hood up off my face, I slept very comfortably. Problems that I had were that the DWR wore out (so it would wet out very easily), the zipper started failing and I got a hole in the mesh. But I have slept a solid 250 nights in this thing over the years and I am surprised it has lasted as long as it has.
2. Sleeping
Enlightened Equipment Revelation X (20 degree): Great quilt, kept me warm every night and was overkill for 75% of the trail. I liked the quilt a lot and my only complaint was that I really didn't need that much warmth. It weighs 26 oz and took up a fair bit of room in my pack. If I were to do the PCT again I would get a lighter quilt and supplement it with a warmer hooded jacket. This way I could mail the jacket ahead to Cascade Locks from Echo Lake and not have to carry the extra weight!
Thermarest Neoair (full length): Absolutely loved it! I was so happy to snuggle into my cocoon every night and this is about as comfortable as my bed at home. Having said that, in the future I might just go for a foam pad. Sure its not as comfortable but I was so tired every night that I would have slept anyways. Blowing it up and deflating it every morning was tiresome and I was always paranoid about putting a hole in it. A closed cell foam pad is much simpler and bomb proof.
Gossamer Gear 1/8" thinlite pad: Basically protection for my neoair and I used it to nap on. Some hikers use this as their only pad, they are god-like and magical, I cannot imagine being comfortable with just this. But for what I used it for, perfect.
3. Backpack
Zpacks Arc Blast 60L (full review): I really wanted to like this pack but I switched it out in Lone pine (~ 750 miles into the trip). For the weight and bulk I was carrying this pack was not sufficient and I had very painful shoulders and hips. If I were to use this, I would absolutely have to have a base weight under 10 lbs. Also, you will be lucky to get more than one thru hike out of this pack.
HMG Windrider 4400 (full review): I really liked this pack, almost perfect for a thru hiker. I carried it for the remaining 1900 miles and will continue to use it in the future. The 4400 size is overkill for most, but I managed to fill it up a few times. I still can't believe I could fill it up... Carried incredibly well, water resistant, durable and you can impress your friends with the cuben fiber. However, they are not cheap and if I didn't get a hefty discount I would never have bought one. But read my full review for the full story.
Clothing Worn:
Columbia Tamiami long sleeve shirt: Awesome hiking shirt! I use this for work when I am in the field in temperatures up to 120 and it breathes really well. This has been my go-to hiking shirt for the past 5 years and will continue to be. Size runs large so buy one size smaller.
Nylon Shorts: I got mine at the thrift store for four dollars and they lasted 5 years and 4500 miles. Try to avoid expensive shorts, they are not worth it. I like having big pockets to put snacks and my phone in, you may be different.
Synthetic boxers: I used REI brand, they worked. Some people prefer commando, I don't.
Darn Tough socks (no show ultralight versions): Great Socks, get them on sale and have them for life. Mine lasted about 300-400 miles each then I would turn them in at an outfitter on the trail and get new ones for free. Lifetime warranty FTW!
Brooks Cascadia 9 shoes: Completely subjective choice, footwear is probably one of the most difficult gear decisions. These worked for me, I could get 900 miles on a pair (not really recommended) and I never got a single blister (may not be the shoe I almost never get blisters). I did have daily foot pain that never went away, this seems to be my curse as I always get foot pain in any shoe I have ever used, usually after 10-12 miles.
Outdoor Research Sunrunner hat: Great sun hat, I wore it every day. It started to fall apart by the end of the trail.
Simblissity Levigaiters: I love light gaiters and have used these for years but now I hate them. They did not stay secured very well for me and I found myself admiring all the dirty girl gaiters everyone else had. The dirty girls need the Velcro tab, but really a little super glue and you are golden. Do yourself a favor and get the most crazy and loud dirty girl gaiters you can.
Other Clothing:
Just a preface, this is where I would make the most gear changes if I were to do the PCT again.
Patagonia Houdini Windshirt: Pretty awesome piece of clothing and I wore it quite a bit but I would not take it again. I would just use my rain jacket instead.
Montbell Stretch Windpants: I love these and I will cry when they wear out. I wore shorts most of the time but when I didn't I wore these.
Patagonia Capilene 1 tops and bottoms: I used these mainly to keep my sleeping quilt clean. I only needed them for warmth maybe 4 days on the whole trail. I would not take these again, I would take a set of Terramar silk tops and bottoms at half the weight and price and 1/4 the durability (be careful!). Or just be a dirtbag and wear your hiking clothes to bed.
Montbell Ultralight Down Jacket: Great jacket, I love the fit of Montbell but this one is not very warm. I would switch out for a warmer hooded jacket that is 12 oz or less and be happy. My ultimate thru hike jacket is the Nunatuk Skaha Plus, but unless you use dollar bills to wipe your ass, you probably can't afford it. The Montbell Mirage Parka looks pretty decent (also not cheap but at least not insane).
Outdoor Research Helium II rain jacket: I liked it, I would take it again. Never really got to test out how waterproof it was because I was using an umbrella but it worked well to shed wind and keep me warm when I needed it.
Zpack cuben rain wrap: I don't know what to say about this. It is a great idea and works well except that the zipper broke the 3rd time I used it. I continued to use it after that, I just couldn't unzip it, fortunately it broke near the top so I could still walk normally while wearing it. I brought a pair of rain pants starting in Washington that I never used, the rain wrap thing is really functional, just watch the zipper.
Mountain Hardwear liner gloves: They weigh about 1oz and I used them from the border up to Yosemite and then from Snolqualmie pass to the Canadian border. Not super warm but if you are in the normal thru hiking season you don't need a super warm glove.
Mountain Laurel Design rain mitts: I only used these a couple of times, they are not waterproof, kind of disappointing. Not really necessary until Washington and I would try the Zpacks cuben fiber ones.
Zpacks fleece hat: It fit pretty well and kept my shaved head warm.
Cheap Flip Flops: Spend a little more and get the 10$ flip flops, they will last the entire thru hike and your feet will love you. I went through 4 pairs of cheap ones and finally wised up. I used flip flops every single day, great for letting your feet air out and breathe.
Cooking and Hydration:
Snowpeak Litemax Canister stove: It worked really well, and I ended up using it for the entire hike and sending my alcohol stove home. They are safer than alcohol, they heat up water much faster and you can simmer. What's not to like? Well, from Oregon north, finding fuel is sometimes a pain.
Evernew titanium pot 1100 mL: Worked well but bigger than I needed, a 900 mL would have been fine and lighter. Check out Toaks, they have super light titanium cookwear for cheap!
Titanium spoon: go for the long handle and keep your hands cleaner.
Snowpeak titanium mug 600 mL: really not necessary, I am not sure if I would take a cup on a future thru hike, but a nice luxury. Again, check out Toaks for good options.
Insulating Pot Cozy: I liked having it, you could use your jacket or sleeping bag but what if it spills?
Sawyer mini water filter: I loved this at first and then hated it by the end. No matter how many times I backflushed it would clog up very quickly and filter very slow. Do yourself a favor and get the normal sized one, and definitely bring the plunger thingy to backflush. If I didn't hate the taste of Aqua Mira, I would probably use that instead. Also, I used my filter in a gravity set up, I still like this method as the squeezing gets old pretty fast. If you do this with the normal sized sawyer you will need an adapter to fit it into a tube.
Platypus bladders: I got 2 leaks and had to replace them, but overall very happy. Really lightweight and collapsible option. Smartwater bottles work well too and are cheaper but not collapsible.
Camera and Electronics:
Camera Gear:
This could be the subject of an entire blog post, so I am not going to go into it here. Plus, I still don't know how I feel about what I did. I questioned my sanity every day but as a photographer I could not do without. I will say that if you never plan on printing your photos and they are for the web only, then a small camera or even a smartphone with a good camera will be fine. If you are picky and critical like I am, then just grin and bear it.
Electronics:
Homemade solar panel: My dad made it for me (thanks Dad!) and it worked great, was free and fairly light. If I was to do it again, I would just bring an external battery that can charge my phone a couple times per charge and be happy. As a side note I originally planned to use the solar charger to charge my camera batteries as well, I ended up not needing to do that, three camera batteries was more than enough.
Eton Boostblock 6600 mAh: I bought this from Amazon while on the trail and had it delivered to Callahans near Ashland (I am still amazed by this whole internet thing). It weighs 6 oz and took a while to charge but would keep me powered for at least 10 days. Unless you are a power user, this is pretty much all you need.
Motorola Moto G: It cost $200 was unlocked and did everything I needed. The camera on it sucks, just so you know. I never had a smartphone until I started this hike, I found it to be extremely useful. Not only are there some great apps for the trail but you can check weather, order gear (and pizza!), take notes, blog from the trail. It really was a great device. If you can afford it, Verizon had the best coverage by far. I had AT&T and was disappointed often.
Everything Else:
First Aid Kit: bring it and know how to use what you bring, hopefully you wont have to. I never did.
Gear Repair Kit: again, useful if you need it, useless if you don't but I would bring it again. I used cuben fiber repair tape once on my pack and that was it. I watched Slow Bro repair his hipbelt with a needle and thread, he was really glad he brought a kit.
Toiletries: Brush your teeth! A side note about toilet paper - if you use it, Pack it Out! Please! I am not anti TP, I use it and love it but I carry it out in a little plastic bag. Its not a big deal and then you are not contributing to trashing the PCT. Thank you.
Zpacks cuben fiber stuff sacks: All of my cuben fiber stuff sacks wore out quickly and were never waterproof, I switched to Outdoor Research silnylon dry bags and was happy for the change. More durable and actually water proof.
Aloksak (large size): I used this more for peace of mind, they would last about 400 miles. At first I could fit 4-5 days of food in one, when hiker hunger came on I could not fit more that 2.5 days of food in them. I slept with my food every night, never had a problem with bears or mice. Was it because of these? I don't know but I will keep using them.
Brunton ADC Pro: It can do pretty much everything except cook me dinner. Was kind of cool checking wind speeds in the desert and water speed when crossing creeks. Of course it does temperature, barometric pressure, altitude and a bunch of other stuff. What I mainly used it for was as my morning alarm and I would bring it again.
Petzle Tikka headlamp: I have mixed feeling about this. It worked but I think I really could have got away with a much smaller headlamp. I didn't night hike very often and ended up using this just around camp at night. I would look for a lighter option for a thru hike.
Black diamond Trail trekking pole: I only use one pole for some reason but I really like having it. I ended up breaking the tips off 2 poles but it could be the way I jab at things as I walk. Most people used trekking poles but it is a personal choice.
Halfmile maps: Use them and love them! Don't be like that stoned guy I met walking the wrong way down the trail because he was hiking without maps. And don't think it was because he was high, there were plenty of high people walking the right direction.
Swing Lightflex umbrella: same thing as the Golite Chrome Dome and now the only thing since Golite is bankrupt. I am still not sure how I feel about the umbrella. It was great in the desert, when it wasn't windy, which is about 10% of the time. It was great in the rain, when it wasn't windy, which was more like 75% of the time. I carried mine for the entire trail but used it rarely. I guess I really like the idea of the umbrella but maybe the reality of it is not so great. I would probably not bring it one for the desert again, cool to have but kind of a pain in the ass too. If I was expecting extended rain without much wind then it would be great, but otherwise I think it stays at home.
Gossamer Gear Polycro groundsheet: Super light and works great! I replace mine halfway through and was happy. It doesn't provide much protection from pokey things but for keeping your stuff off the ground its great.
Titanium stakes: they worked well, I bent one but otherwise no issues.
Brunton Compass: never used it, sent it home and never thought about it again.
Sierra Specific Gear:
BV500 bear canister: I used it because a canister is required, you should too but there is no way I could fit more than 5 days of food in one.
Sea to Summit headnet: kept me sane, highly recommended. I didn't actually need one until almost Oregon but I carried it from Lone Pine just in case.
Sea to Summit Nano pyramid net (full review): cool idea, I did use it a few times but the bugs were just not that bad this year and I sent it back from Ashland.
That pretty much sums it up. Go as light as you possibly can without jeopardizing your safety, every ounce really does count and your feet, legs and knees will thank you. If I were to do this hike again, I would aim to get my base weight down to 8 lbs (without camera gear dammit!). I hope this was post was helpful. If you are planning a thru hike, have fun you will absolutely not regret it. If you are not planning one, well maybe its time to think about it?


.jpg)
.jpg)
.jpg)
.jpg)


.jpg)

-2.jpg)
.jpg)
-3.jpg)


.jpg)


-3.jpg)
.jpg)
-4.jpg)

